
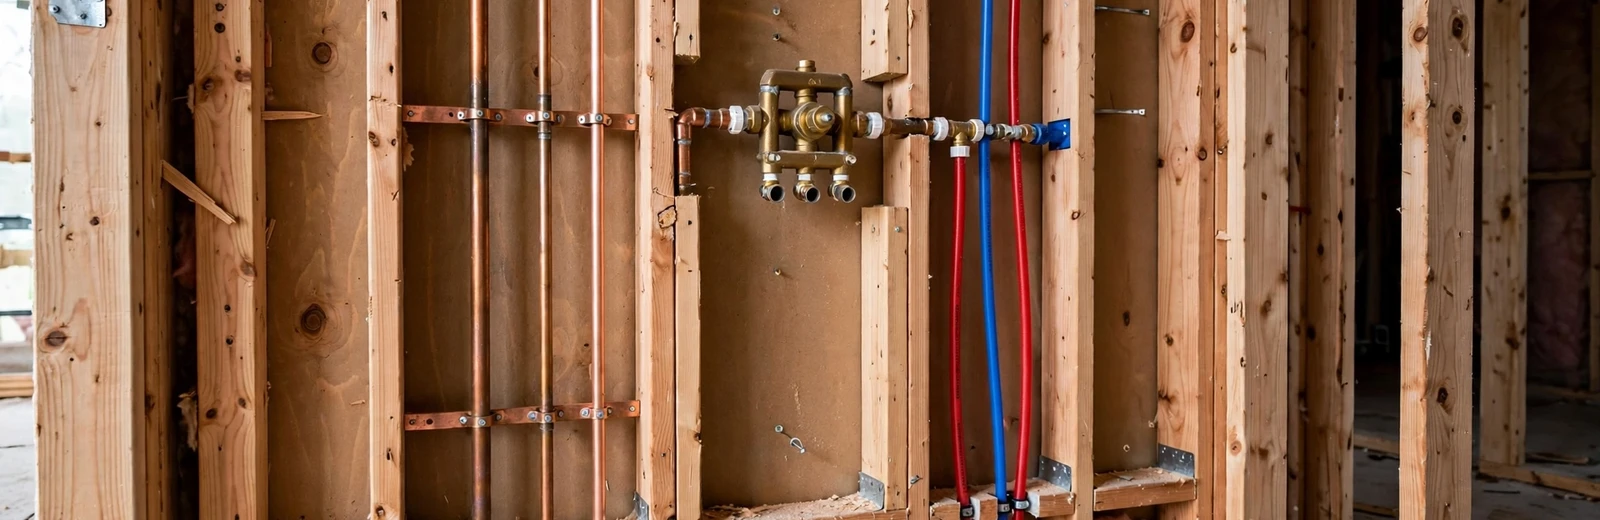
To plumb a shower, you run hot and cold supply lines to a mixing valve set at the depth the maker specifies. Then you connect a drain to the pan or tub, vent it, pressure test the lines, and only then close the wall. The trim, which is the handle and showerhead, goes on last.
The order matters more than any single part. Mistakes made behind a finished wall mean opening it again, so most of the care goes into measuring, setting the valve and testing before tile or panels go up.
This guide covers the sequence at a high level so you can judge your own job. Specific sizes and distances come from the valve maker's instructions and from the Ohio Plumbing Code, and we point you to both rather than quote numbers from memory.
Choose what you are building first
A tub with a shower over it, a stand-alone shower with a pan, and a walk-in with a tiled floor all need different drains. A tub drain sits at the end of the tub. A pan drain sits in the floor and the pan has to slope to it.
Pick the valve and trim before you cut a pipe. Valves differ in how deep they sit and in how they mix hot and cold. Buy the valve, read its rough-in sheet and mark the framing to match it.
If you are replacing an existing shower, take photos of the old arrangement before you demolish it. Those pictures show where the drain and vent run, and they save a lot of guessing later.
The rough-in, in order
Plumbers work in roughly this order. Skipping ahead is how walls get opened twice.
Set the framing and the valve
Add blocking between studs for the valve and showerhead arm. Set the valve at the depth on its rough-in sheet so the trim covers the wall finish.
Run the supply lines
Connect hot and cold from the nearest supply to the valve inlets, and run a pipe from the valve outlet up to the showerhead. Secure each pipe so it cannot rattle.
Place the drain and the vent
Connect the shower drain to the house drain with a trap and a vent. The vent lets air in behind the water so the drain empties quietly instead of gurgling.
Install the pan or tub
Set the tub on a solid bed or build the pan with its waterproof liner and drain. Flood the pan to check that it holds water.
Pressure test and inspect
Cap the lines, pressurize them and watch a gauge. A pressure drop means a leak you can find now rather than behind tile.
Permits, code and hard water in Sidney
In Shelby County, the Sidney-Shelby County Health Department says anyone doing plumbing work needs to apply for a permit. The regulation exempts minor repair, such as cleaning stoppages or maintaining leaks without rearranging pipes or fixtures. A new shower moves pipe, so call 937-498-7249 and describe your job before you start.
Ohio updated its plumbing code effective March 1, 2024, and the code you build to is the Ohio Plumbing Code in force when you pull the permit. We do not quote its section numbers here. Ask the Health Department which rules apply.
The valve you pick should suit local water. The city's 2022 water quality report listed total hardness of about 113 ppm, in the moderately hard range on the USGS scale. Minerals build up inside cartridges, so choose a valve whose cartridge is easy to remove and replace, and plan an access panel so you can service it without cutting the wall.
Call and we will talk through the rough-in, the permit call and the price.
What a homeowner can do and what to hand off
Many people can handle the visible parts of a shower build. The hidden parts are where a plumber earns the visit.
Reasonable for a homeowner
- Demolish the old shower and clear the framing.
- Add blocking and mark the valve depth from the rough-in sheet.
- Install the trim and showerhead at the end.
- Check the finished shower for leaks with the lines under pressure.
Better handled by a plumber
- Moving the drain or vent, or tying into the house drain.
- Soldering or crimping supply lines inside the wall.
- Building the pan and the waterproof layer.
- Passing the permit and any inspection.
Common mistakes that cost a second visit
The most common mistake is setting the valve too deep or too shallow. If the valve is too deep, the trim does not reach. If it is too shallow, the finish wall will not cover it. Always set it after you know the thickness of the finished wall.
The second is skipping the pressure test because the lines look fine. A pinhole at a joint can drip for weeks before it shows on the other side of the wall. Test with the walls open.
The third is forgetting access. If the cartridge ever needs replacing, you want an access panel or a trim that can be removed without destroying tile. A little planning here saves a lot of demolition later. Our faucet repair crew sees tub and shower valves failed behind sealed walls often enough to say this plainly.
Drain and vent: where most DIY jobs stall
The supply lines are the easy half. The drain has to slope toward the house drain, hold a trap seal and be vented. Slow drainage, gurgling and sewer smell all trace back to a drain or vent that was connected without a plan.
If your bathroom is on an upper floor, or if the drain must cross a floor joist, ask a plumber to look before you cut. That is where most new-shower projects turn from a weekend job into a plumber's job. Our plumbing installation work covers new drain and vent runs as well as the supply side.
Older homes bring one more question. The city plan estimates that 30 percent or more of Sidney homes were built before 1950, so expect old galvanized or cast iron pipe behind some walls. Connecting new lines to old pipe is a good moment to check the condition of what you are tying into.
Checklist before you close the wall
- The valve depth matches the rough-in sheet and the wall thickness you chose.
- Supply lines are secured and sit away from sharp edges.
- The drain slopes toward the house drain and has a trap and vent.
- The pan or tub holds water without a drop in level.
- The supply lines held pressure on a gauge for the time the instructions call for.
- You have called the Health Department about the permit and any inspection.
Where to go from here
If you are working out of town, the same sequence applies in Anna and Piqua. Plumbing permits are issued through different offices depending on the county, so ask your local office. In Piqua, ask the Miami County plumbing office.
When you want help, call us. We can do the whole shower or just the rough-in and the pressure test, and we give a clear price before work starts.
Common questions
Do I need a permit to plumb a new shower in Sidney?
Anyone doing plumbing work in Shelby County needs a permit from the Sidney-Shelby County Health Department, with an exemption for minor repair. Moving or adding pipe is not a minor repair. Call 937-498-7249 and describe your job.
How deep should the shower valve sit?
Follow the valve maker's rough-in sheet and the thickness of your finished wall. The depth is set so the trim covers the opening, and the numbers differ by model.
Does a shower drain need a vent?
Yes. Every fixture drain needs a vent so air can follow the water down. Without one the drain gurgles, drains slowly and may pull the trap dry.
Why test the lines before closing the wall?
A leak inside a closed wall can run for weeks before it shows. A pressure test with the wall open finds it in minutes, when the fix is a single joint.
Will hard water affect my new shower valve?
Over time, yes. Minerals collect in the cartridge and the showerhead. The city's 2022 report listed about 113 ppm hardness, so plan on occasional cleaning or a cartridge swap.
Can you plumb the shower and leave the tile to me?
Yes. We can do the rough-in, the drain and the pressure test, and leave the wall open for your tile setter. We give the price before work starts.